Header Matte Painting by Pau Minguell
X_Denoise
X_Denoise is a noise reduction gizmo that can be used to repair damaged or compressed footage. It does the same function of the Nuke Denoise, but using a different algorithm that can sometimes provide better results.
While most de-noisers try to work out which small pixels are susceptible to be noisy, the X_Denoise averages different frames in order to smooth the noise, making it invisible to the eye. The gizmo offers multiple settings to take control over how many frames are being used and how much detail is preserved.

You will no longer see vibrations over time, your clip will be smooth and noise-free.
No filtering will be applied at any time. You can decide if you want to apply a median filter to the noisiest areas.
Using the built-in Nuke capabilities, GPU can be used for some parts of the calculation.

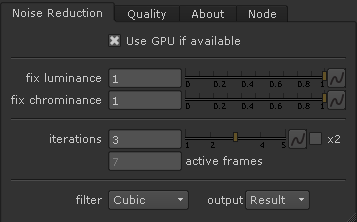
Treat chromatic and luminance noise separately. The controls are simple, user friendly and well documented.
Some examples:
You can download some sample footage here. This section contains quite a lot of gifs. Video would compress the noise. It may take a while to load! :)

The Nuke Denoise does get rid of all the small grain and imperfections, but yet you can still see some vibration. X_Denoise removes this vibration while keeping almost every detail. (See the detail in the water)


Check the details and the thin lines in the bottom left snow. With the Nuke Denoise they are blurred, but they remain untouched with X_Denoise. You can also see some improvements on the darkest rocks.
X_Denoise works really well in static shots, to the point that it can be hard to decide if it is a picture or a video, but sometimes passing objects can create some weird artifacts or be blurred.


Check how X_Denoise can reduce the “salt and pepper” noise (the big white and black spots). It also achieves smoother results on low light areas. And even in this old footage, the detail preservation is really high.
How does it work?
An image it’s just a bunch of pixels put together. There is no information on a video file about what’s on the image, whether or not a pixel is affected by noise and what represents detail or texture. The only information stored in most formats are the red, green and blue channels. Yes, sometimes the alpha channel too. Yes, I do know what exr files are, stop it!
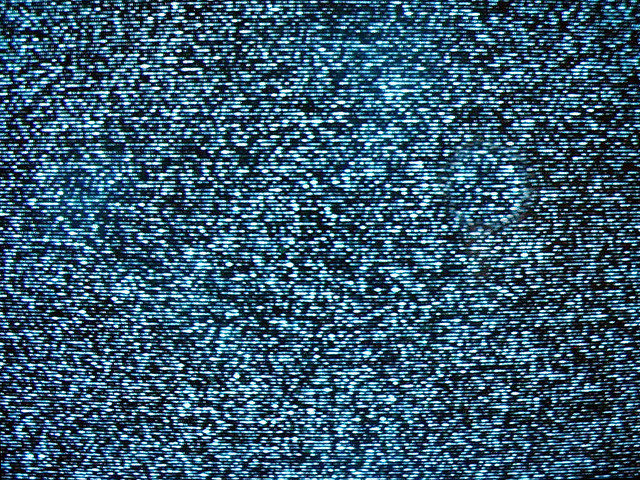
Imagine that we are filming the famous scene from “The Ring” where a not-so-friendly lady comes out from a static noise TV. Then we want to remove the digital noise from the image, but not the static noise from the TV. How could the program know what is noise from the camera and what is the static noise on the TV? And, of course, we do not want to roto the TV, we want something procedural and flexible. And we want it to be easy to use. Oh!, and make it fast!
Seek and destroy
Brown solid with noise

Sand texture

There are many ways to decide how much noise a pixel has. You could try to look for small pixels which differ from the surrounding patterns, you could try to smooth the hole images keeping the borders intact, you could apply complex statistical models which decide if a pixel is susceptible to be noisy, etc.
But we do not want to affect the detail and textures of the image. A blur filter will remove all the noise, but it will also destroy the rest of the image. A median filter is more subtle, but it will only work when the noise is very visible and very small.
Our goal is to find a criteria which helps us to separate the damage pixels. What’s different between a video of a sand beach and pure noise? They both have small detail, the pattern is random in most cases and it affects all of the channels. How can we know that bright spot on the beach is caused by a sand grain or a noisy pixel?
The answer lies on the very nature of video. Video is a changing image, it moves over time. Objects don’t move randomly over time, but noise does.
An important difference between noise and detail is that noise changes randomly over time

I lied before. Kind of. I said that the only information stored on a video is the rgb (luminance + chrominance). But that doesn’t mean that there isn’t more information available. A video has movement, it changes over time. Objects have a scalar value rgb (or brightness and colour), a position (x,y) and a vector of velocity ⃗v.
We can extract the motion vectors using Optical Flow. OFlow it’s not just a Nuke node: it’s an entire branch of the image sciences. It has been used traditionally for retiming videos (mostly skateboard and pool jumps). But that is only the tip of the iceberg. Many clever people are working on brilliant applications for this technique.
Seek and destroy
Any change in a pixel value can be caused by movement, light or texture changes and noise. So, once we have all the motion vectors of the video, we will distort a few frames before and after the current frame so all the elements of the video remain in the same point. If this were true, the only change in the image will now be the noise and illumination changes.
In practise, some movements are to complex to stabilize, or have occlusions, so some parts of the image won’t match at all. And if the motion vectors haven’t been created properly, we could even find cases were all the frames don’t match at all. This will create some ugly glitches and artifacts. Most of them can be corrected, but we will talk about that later.
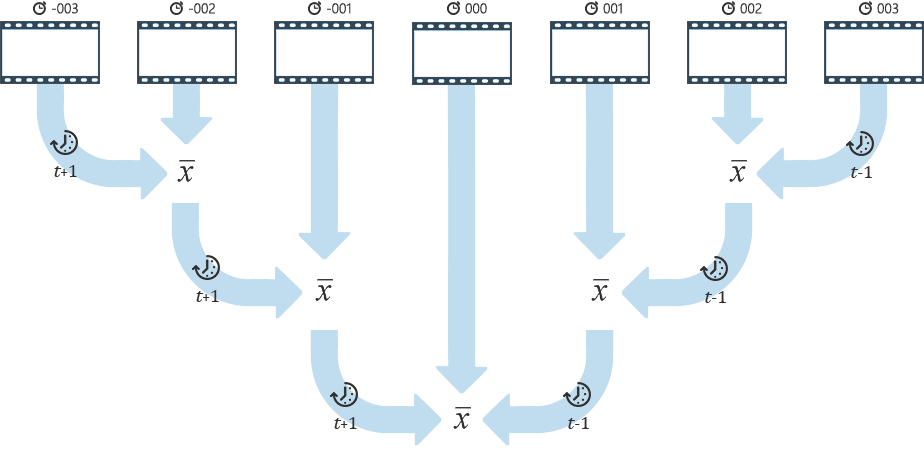
So by averaging multiple frames we will be smoothing the noise over time, making it far less visible to the eye. By applying distortion using the generated motion vectors we avoid adding extra motion blur or ghosting to the image. We also want to apply the distortion step by step. For instance, for frame number 003, we will distort it 3 times using the motion vectors generated from the frames 000, 001 and 002. That will make a more precise transformation and cause less artifacts.
Distribution
An important thing to have in mind is that the further a frame is from the current frame, the most likely is to cause problems on the final image. It’s important to choose a good distribution of frames. Making X_Denoise an iteration based process makes it very simple to distribute frames in an acceptable way. Each iteration will add an equal amount of multiplier to all frames on the calculation, so newer frames (those added by the last iterations) will have less impact on the overall result.
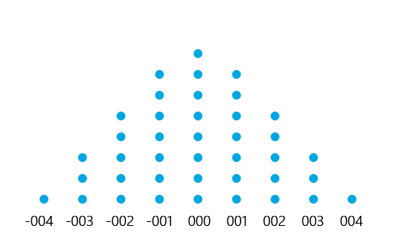
Distribution with 4 iterations. Each iteration has added an extra “dot” to each frame. Frames at the ±004 position only have an impact of 2.5%.
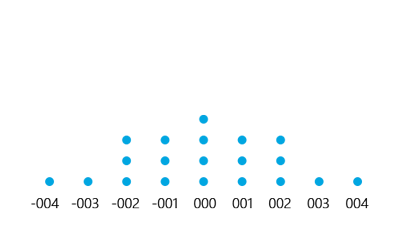
Distribution with 2 iterations. Each iteration has added two extra “dots” to each frame. Frames at the ±004 position have now an impact of 5%.
Knowing the limitations
The only absolute truth is that there are no absolute truths. The other absolute truth is that there is no perfect technique to clean noise on every possible video. And if someone ever discovers it, I’m sure it won’t be something simple, easy and fast. Each tool has its strengths and weaknesses, and X_Denoise is not an exception.
That’s why X_Denoise is capable of returning a mask of those areas where it’s likely to fail as an output. Then the user can use that mask to use both X_Denoise and Nuke Denoise to make a very precise noise reduction. I do have some ideas in mind to improve the algorithm, but that will have to wait while I work on some other projects.
X_Denoise will not always work if:
- The image is very shaky or has too much motion blur. The generated motion vectors might not be good enough.
- An object moves really fast over a still background. Due to occlusion, the background and/or the object will be blurred out.
- There are multiple shots appended together. X_Denoise won’t detect scene cuts in you footage.
- Violent light changes. Flashing lights will be smoothed out with the noise.

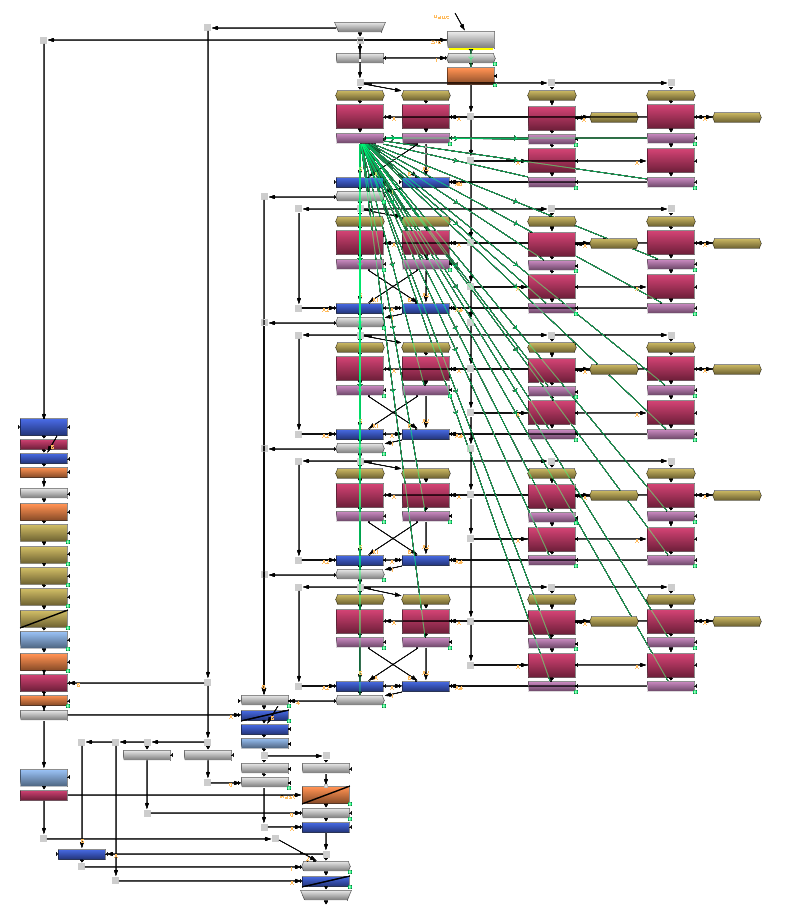
X_Denoise node graph as of version 1.1
“I frequently hear music in the very heart of noise.”
George Gershwin